No edit summary Tag: Visual edit |
No edit summary Tag: Source edit |
||
| (19 intermediate revisions by the same user not shown) | |||
| Line 2: | Line 2: | ||
Unlocked after completing Chapter 6 of the main story, a Gray Demon can be summoned by filling up the Death Match meter in [[Boss Battle|Boss Battles]]. It is the main source of Gray Demon’s Wing, a material used to Limit Break heroes to Level 70 and above. |
Unlocked after completing Chapter 6 of the main story, a Gray Demon can be summoned by filling up the Death Match meter in [[Boss Battle|Boss Battles]]. It is the main source of Gray Demon’s Wing, a material used to Limit Break heroes to Level 70 and above. |
||
| − | |||
Gray Demons can fly and are invulnerable against melee attacks on the duration of the flight buff. Unlike the Red Demon, it cleanses all debuffs at the start of its turn which renders all crowd-control effects such as Freeze and Petrify to be useless. |
Gray Demons can fly and are invulnerable against melee attacks on the duration of the flight buff. Unlike the Red Demon, it cleanses all debuffs at the start of its turn which renders all crowd-control effects such as Freeze and Petrify to be useless. |
||
| Line 17: | Line 16: | ||
<br /> |
<br /> |
||
===Flight Buff Pattern=== |
===Flight Buff Pattern=== |
||
| − | {| class="wikitable" |
+ | {| class="wikitable" style="text-align: center" |
|'''Normal''' |
|'''Normal''' |
||
| ⚫ | |||
| − | + | * Phase 1: Starts the battle in a flying state with a green flight gauge. When depleted, causes the Gray Demon to fall on the ground and get stunned for 1 turn. |
|
|- |
|- |
||
|'''Hard''' |
|'''Hard''' |
||
| + | | |
||
| − | + | * Phase 1: Starts the battle in a flying state and lands on the ground alternatively after 3 turns. |
|
|- |
|- |
||
|'''Extreme''' |
|'''Extreme''' |
||
| + | | |
||
| − | + | * Phase 1: Starts the battle in a flying state and lands on the ground alternatively after 3 turns. |
|
| − | |||
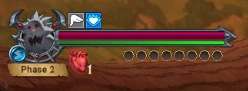
| − | Phase 2: Starts the battle in a flying state with a green flight gauge. When depleted, causes the Gray Demon to fall on the ground and get stunned for 1 turn. |
+ | * Phase 2: Starts the battle in a flying state with a green flight gauge. When depleted, causes the Gray Demon to fall on the ground and get stunned for 1 turn. |
|} |
|} |
||
| ⚫ | |||
| ⚫ | |||
| + | <br /> |
||
| ⚫ | |||
| ⚫ | |||
| ⚫ | |||
| ⚫ | |||
| − | |||
| ⚫ | |||
| ⚫ | |||
| |
| |
||
| − | |Normal |
+ | |'''Normal''' |
| − | |Hard |
+ | |'''Hard''' |
| − | |Extreme |
+ | |'''Extreme''' |
|- |
|- |
||
|Level |
|Level |
||
| Line 59: | Line 60: | ||
|7,854 |
|7,854 |
||
|10,593 |
|10,593 |
||
| + | | |
||
| − | |14,264 |
||
| + | * Phase 1: 14,264 |
||
| − | |||
| − | 16,716 |
+ | * Phase 2: 16,716 |
|- |
|- |
||
|Defense |
|Defense |
||
|3,450 |
|3,450 |
||
|4,650 |
|4,650 |
||
| + | | |
||
| − | |5,850 |
||
| + | * Phase 1: 5,850 |
||
| − | |||
| − | 7,760 |
+ | * Phase 2: 7,760 |
|- |
|- |
||
|HP |
|HP |
||
|184,660 |
|184,660 |
||
|293,580 |
|293,580 |
||
| + | | |
||
| − | |366,380 |
||
| + | * Phase 1: 366,380 |
||
| − | |||
| − | 409,360 |
+ | * Phase 2: 409,360 |
|} |
|} |
||
| + | <br /> |
||
| − | == |
+ | ==Strategy and Team Composition== |
Each demon has its unique trait and applies a certain strategy to defeat it. While the trick for Red Demon requires constant crowd-control, Gray Demon can be conquered using these various approaches: |
Each demon has its unique trait and applies a certain strategy to defeat it. While the trick for Red Demon requires constant crowd-control, Gray Demon can be conquered using these various approaches: |
||
| − | === |
+ | ===Burst=== |
<nowiki>*</nowiki>Highly Recommended |
<nowiki>*</nowiki>Highly Recommended |
||
{| style="border: 1px solid black; width: 100%;" |
{| style="border: 1px solid black; width: 100%;" |
||
| Line 88: | Line 90: | ||
! width="12%" style="background: #260B06; border: 1px solid black;" |[[File:Rgowther.png|link=Red Gowther|75x75px]] |
! width="12%" style="background: #260B06; border: 1px solid black;" |[[File:Rgowther.png|link=Red Gowther|75x75px]] |
||
! width="12%" style="background: #260B06; border: 1px solid black;" |[[File:Gcain.png|link=Green Cain|75x75px]] |
! width="12%" style="background: #260B06; border: 1px solid black;" |[[File:Gcain.png|link=Green Cain|75x75px]] |
||
| − | | |
+ | |} |
| + | {| style="border: 1px solid black; width: 100%;" |
||
! width="12%" style="background: #260B06; border: 1px solid black;" |<font color="white"> Damage |
! width="12%" style="background: #260B06; border: 1px solid black;" |<font color="white"> Damage |
||
! width="12%" style="background: #260B06; border: 1px solid black;" |<font color="white"> Buff |
! width="12%" style="background: #260B06; border: 1px solid black;" |<font color="white"> Buff |
||
| Line 100: | Line 103: | ||
! width="12%" style="background: #260B06; border: 1px solid black;" |[[File:Rgowther.png|link=Red Gowther|75x75px]] |
! width="12%" style="background: #260B06; border: 1px solid black;" |[[File:Rgowther.png|link=Red Gowther|75x75px]] |
||
! width="12%" style="background: #260B06; border: 1px solid black;" |[[File:Bgolgius.png|link=Blue Golgius|75x75px]] |
! width="12%" style="background: #260B06; border: 1px solid black;" |[[File:Bgolgius.png|link=Blue Golgius|75x75px]] |
||
| − | | |
+ | |} |
| + | {| style="border: 1px solid black; width: 100%;" |
||
! width="12%" style="background: #260B06; border: 1px solid black;" |<font color="white"> Damage |
! width="12%" style="background: #260B06; border: 1px solid black;" |<font color="white"> Damage |
||
! width="12%" style="background: #260B06; border: 1px solid black;" |<font color="white"> Buff |
! width="12%" style="background: #260B06; border: 1px solid black;" |<font color="white"> Buff |
||
| Line 107: | Line 111: | ||
|}<br /> |
|}<br /> |
||
| − | === |
+ | ===Ult-Rush=== |
<nowiki>*</nowiki>Safe team for beginners without a Green King |
<nowiki>*</nowiki>Safe team for beginners without a Green King |
||
{| style="border: 1px solid black; width: 100%;" |
{| style="border: 1px solid black; width: 100%;" |
||
| Line 114: | Line 118: | ||
! width="12%" style="background: #260B06; border: 1px solid black;" |[[File:Rgowther.png|link=Red Gowther|75x75px]] |
! width="12%" style="background: #260B06; border: 1px solid black;" |[[File:Rgowther.png|link=Red Gowther|75x75px]] |
||
! width="12%" style="background: #260B06; border: 1px solid black;" |[[File:Gmerlin.png|link=Green Merlin|75x75px]] |
! width="12%" style="background: #260B06; border: 1px solid black;" |[[File:Gmerlin.png|link=Green Merlin|75x75px]] |
||
| − | | |
+ | |} |
| + | {| style="border: 1px solid black; width: 100%;" |
||
! width="12%" style="background: #260B06; border: 1px solid black;" |<font color="white"> Heal / Ult Charge |
! width="12%" style="background: #260B06; border: 1px solid black;" |<font color="white"> Heal / Ult Charge |
||
! width="12%" style="background: #260B06; border: 1px solid black;" |<font color="white"> Buff |
! width="12%" style="background: #260B06; border: 1px solid black;" |<font color="white"> Buff |
||
| Line 126: | Line 131: | ||
! width="12%" style="background: #260B06; border: 1px solid black;" |[[File:Rgowther.png|link=Red Gowther|75x75px]] |
! width="12%" style="background: #260B06; border: 1px solid black;" |[[File:Rgowther.png|link=Red Gowther|75x75px]] |
||
! width="12%" style="background: #260B06; border: 1px solid black;" |[[File:Gcain.png|link=Green Cain|75x75px]] |
! width="12%" style="background: #260B06; border: 1px solid black;" |[[File:Gcain.png|link=Green Cain|75x75px]] |
||
| − | | |
+ | |} |
| + | {| style="border: 1px solid black; width: 100%;" |
||
! width="12%" style="background: #260B06; border: 1px solid black;" |<font color="white"> Heal / Ult Charge |
! width="12%" style="background: #260B06; border: 1px solid black;" |<font color="white"> Heal / Ult Charge |
||
! width="12%" style="background: #260B06; border: 1px solid black;" |<font color="white"> Barrier / Ult Charge |
! width="12%" style="background: #260B06; border: 1px solid black;" |<font color="white"> Barrier / Ult Charge |
||
! width="12%" style="background: #260B06; border: 1px solid black;" |<font color="white"> Skill-up |
! width="12%" style="background: #260B06; border: 1px solid black;" |<font color="white"> Skill-up |
||
| − | ! width="12%" style="background: #260B06; border: 1px solid black;" |<font color="white"> Sub (Unique) |
+ | ! width="12%" style="background: #260B06; border: 1px solid black;" |<font color="white"> Sub (Unique) |
|}<br /> |
|}<br /> |
||
The most effective strategy is to build around [[Green King]] since he is the strongest attacker against the Gray Demon. Accompany with [[Green Helbram]] / [[Green Gilthunder]] as attack buffer and add [[Red Gowther]] for skill-ups to maximize the damage output. |
The most effective strategy is to build around [[Green King]] since he is the strongest attacker against the Gray Demon. Accompany with [[Green Helbram]] / [[Green Gilthunder]] as attack buffer and add [[Red Gowther]] for skill-ups to maximize the damage output. |
||
| − | {| class="wikitable" |
+ | {| class="wikitable" style="text-align: center" |
|'''Hero''' |
|'''Hero''' |
||
|'''Role''' |
|'''Role''' |
||
| Line 142: | Line 148: | ||
|[[File:Gking.png|link=Green King|75x75px]] |
|[[File:Gking.png|link=Green King|75x75px]] |
||
|Attack |
|Attack |
||
| + | | |
||
| − | + | * Deals bonus damage being a hero with HP attribute and Fairy race. |
|
| − | |||
| − | His unique ability to increase Crit Chance for each Ultimate Move Gage orb allows him to Crit most of the time. |
+ | * His unique ability to increase Crit Chance for each Ultimate Move Gage orb allows him to Crit most of the time. |
| ⚫ | |||
| − | |||
| + | | |
||
| ⚫ | |||
| − | + | * Coin Shop |
|
| ⚫ | |||
| − | |||
| ⚫ | |||
|- |
|- |
||
|[[File:Rgowther.png|link=Red Gowther|75x75px]] |
|[[File:Rgowther.png|link=Red Gowther|75x75px]] |
||
|Skill-up |
|Skill-up |
||
| + | | |
||
| − | + | * Primarily used to skill-up your buffer and attacker’s cards. Green King can deal a lot of damage with a level 3 attack buff from Green Helbram / Green Gilthunder. |
|
| − | |||
| − | His unique ability adds bonus damage if the Hero doesn’t take damage during the boss’ turn, especially when protected by Green Merlin’s barrier. |
+ | * His unique ability adds bonus damage if the Hero doesn’t take damage during the boss’ turn, especially when protected by Green Merlin’s barrier. |
| + | | |
||
| − | + | * Coin Shop |
|
| − | |||
| − | Hero Draw |
+ | * Hero Draw |
|- |
|- |
||
|[[File:Ghelbram.png|link=Green Helbram|75x75px]] |
|[[File:Ghelbram.png|link=Green Helbram|75x75px]] |
||
|Buff |
|Buff |
||
| + | | |
||
| − | + | * His buff is used to boost your team’s attack related stats. |
|
| − | |||
| − | Works hand-in-hand with Red Gowther to easily rank up his buff to level 3. |
+ | * Works hand-in-hand with Red Gowther to easily rank up his buff to level 3. |
| ⚫ | |||
| − | |||
| + | | |
||
| ⚫ | |||
| − | + | * Coin Shop |
|
| ⚫ | |||
| − | |||
| ⚫ | |||
|- |
|- |
||
|[[File:Ggil.png|link=Green Gilthunder|75x75px]] |
|[[File:Ggil.png|link=Green Gilthunder|75x75px]] |
||
|Buff |
|Buff |
||
| + | | |
||
| − | + | * His buff is used to boost your team’s attack (Provides the highest attack buff in-game). |
|
| − | |||
| − | Works hand-in-hand with Red Gowther to easily rank up his buff to level 3. |
+ | * Works hand-in-hand with Red Gowther to easily rank up his buff to level 3. |
| ⚫ | |||
| − | |||
| + | | |
||
| ⚫ | |||
| − | + | * Coin Shop |
|
| ⚫ | |||
| − | |||
| ⚫ | |||
|- |
|- |
||
|[[File:Gelizabeth.png|link=Green Princess Elizabeth|75x75px]] |
|[[File:Gelizabeth.png|link=Green Princess Elizabeth|75x75px]] |
||
|Heal / Ult Charge |
|Heal / Ult Charge |
||
| + | | |
||
| − | + | * Provides healing and Ultimate Move Gauge boost. |
|
| − | |||
| − | Works hand-in-hand with Green Merlin to rush her Ultimate. Starts with 3 Ultimate Move Gauge orbs with Green Merlin on the team. |
+ | * Works hand-in-hand with Green Merlin to rush her Ultimate. Starts with 3 Ultimate Move Gauge orbs with Green Merlin on the team. |
| + | | |
||
| − | + | * Draw Hero |
|
|- |
|- |
||
|[[File:Gmerlin.png|link=Green Merlin|75x75px]] |
|[[File:Gmerlin.png|link=Green Merlin|75x75px]] |
||
|Barrier / Ult Charge |
|Barrier / Ult Charge |
||
| + | | |
||
| − | + | * Provides a barrier to protect the team and mitigate damage from the boss. |
|
| − | |||
| − | Adds an Ultimate Move Gauge orb for your team to provide a head start. |
+ | * Adds an Ultimate Move Gauge orb for your team to provide a head start. |
| + | | |
||
| − | + | * Coin Shop |
|
| − | |||
| − | Hero Draw |
+ | * Hero Draw |
|- |
|- |
||
|[[File:Gescanor.png|link=Green Escanor|75x75px]] |
|[[File:Gescanor.png|link=Green Escanor|75x75px]] |
||
|Attack |
|Attack |
||
| ⚫ | |||
| ⚫ | |||
| ⚫ | |||
| |
| |
||
| ⚫ | |||
| ⚫ | |||
| + | | |
||
| ⚫ | |||
| ⚫ | |||
| ⚫ | |||
| − | |||
| ⚫ | |||
|- |
|- |
||
|[[File:Gcain.png|link=Green Cain|75x75px]] |
|[[File:Gcain.png|link=Green Cain|75x75px]] |
||
|Sub |
|Sub |
||
| + | | |
||
| ⚫ | |||
| ⚫ | |||
| ⚫ | |||
| + | | |
||
| − | |||
| ⚫ | |||
| ⚫ | |||
| ⚫ | |||
| + | |- |
||
| + | |[[File:Bgolgius.png|link=Blue Golgius|75x75px]] |
||
| ⚫ | |||
| + | | |
||
| ⚫ | |||
| + | | |
||
| ⚫ | |||
| ⚫ | |||
|- |
|- |
||
|[[File:Gjericho.png|link=Green Jericho|75x75px]] |
|[[File:Gjericho.png|link=Green Jericho|75x75px]] |
||
|Optional |
|Optional |
||
| + | | |
||
| − | + | * The strategy is to stack her unique ability effects by using skills while the Gray Demon is flying. Then unleash her “Flash Attack” skill or Ultimate when the boss lands on the ground. |
|
| − | |||
| − | Only use when you have no Green King or Green Escanor in your Hero Box. |
+ | * Only use when you have no Green King or Green Escanor in your Hero Box. |
| + | | |
||
| − | + | * Coin Shop |
|
| − | |||
| − | Draw Hero |
+ | * Draw Hero |
|- |
|- |
||
|[[File:Gmeliodas.png|link=Green Meliodas|75x75px]] |
|[[File:Gmeliodas.png|link=Green Meliodas|75x75px]] |
||
|Optional |
|Optional |
||
| + | | |
||
| − | + | * His “Enchant: Hell Blaze” skill is a strong ranged attack. Additionally, merge and rank up “Outburst Counter” as you take damage while the boss is flying, then use the card on your 3rd turn just before the boss lands for a huge counter-attack. |
|
| − | |||
| − | Only use when you have no Green King or Green Escanor in your Hero Box. |
+ | * Only use when you have no Green King or Green Escanor in your Hero Box. |
| + | | |
||
| − | + | * Draw Hero |
|
|- |
|- |
||
|[[File:Bking.png|link=Blue King|75x75px]] |
|[[File:Bking.png|link=Blue King|75x75px]] |
||
|Optional |
|Optional |
||
| + | | |
||
| − | + | * Provides sustain and decent damage while the boss is flying. The boss will also receive additional damage from Shatter effects by using his Ultimate. |
|
| − | |||
| − | Cannot be used with another King present in your team. |
+ | * Cannot be used with another King present in your team. |
| + | | |
||
| − | + | * Chapter 3 Story |
|
| − | |||
| − | Coin Shop |
+ | * Coin Shop |
|} |
|} |
||
<br /> |
<br /> |
||
| − | == |
+ | ==Rewards== |
Various rewards are given after clearing the Death Match which is necessary for Hero Limit Break, Hero Awakening, and Equipment Awakening. |
Various rewards are given after clearing the Death Match which is necessary for Hero Limit Break, Hero Awakening, and Equipment Awakening. |
||
| + | <br /> |
||
| − | === |
+ | ===Reward Rules=== |
| − | * |
+ | *Increased chance to acquire better rewards for winning while alive. |
| − | * |
+ | *Increases Village Friendship upon clearing a Death Match. |
| − | * |
+ | *Gives buff to apply discounts to all items purchased with gold in the village shop. |
| + | <br /> |
||
| − | === |
+ | ===Death Match Victory Reward=== |
| − | {| class="wikitable" |
+ | {| class="wikitable" style="text-align: center" |
| |
| |
||
| − | |Normal |
+ | |'''Normal''' |
| − | |Hard |
+ | |'''Hard''' |
| − | |Extreme |
+ | |'''Extreme''' |
|- |
|- |
||
|Guaranteed Reward |
|Guaranteed Reward |
||
| Line 312: | Line 323: | ||
[[Category:Guides]] |
[[Category:Guides]] |
||
| + | [[Category:Death Match]] |
||
[[Category:Gray Demon]] |
[[Category:Gray Demon]] |
||
| + | [[fr:Guide_du_D%C3%A9mon_Gris]] |
||
| + | [[es:Guía para el Demonio Gris]] |
||
| + | [[de:Grauer Dämon Guide]] |
||
Revision as of 23:50, 24 September 2020
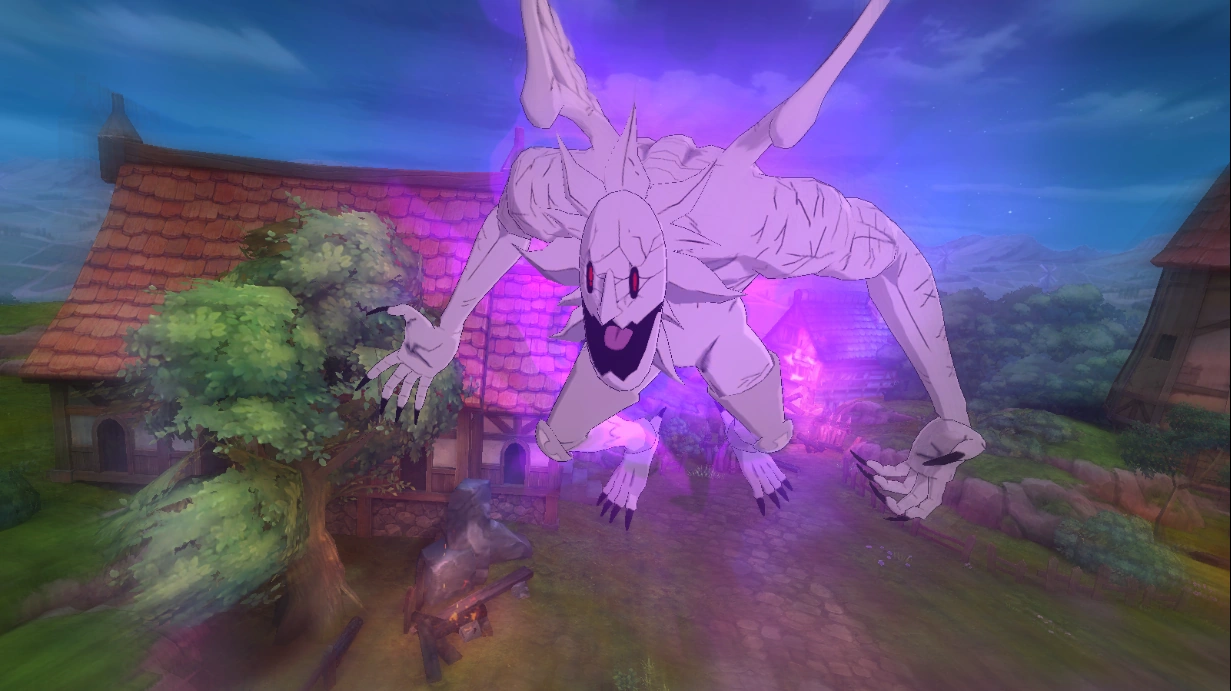
Unlocked after completing Chapter 6 of the main story, a Gray Demon can be summoned by filling up the Death Match meter in Boss Battles. It is the main source of Gray Demon’s Wing, a material used to Limit Break heroes to Level 70 and above.
Gray Demons can fly and are invulnerable against melee attacks on the duration of the flight buff. Unlike the Red Demon, it cleanses all debuffs at the start of its turn which renders all crowd-control effects such as Freeze and Petrify to be useless.
Gray Demon: Basic Info
- Attribute:
 Speed
Speed
- Weak to
 HP-type and strong against
  Strength-type heroes
- Weak to
- Weak to Fairies and strong against Giants
- King’s “Bad Blood” with the Gray Demon decreases the boss’ damage by 30%.
- Immune to Debuff and Dissolve. Crowd-control and Ultimate Move Gauge depletion don’t affect the Gray Demon.
- Melee attacks are ineffective while the Flight Buff is active (only ranged attacks work). Melee attacks are effective when the enemy is stunned from falling.
Flight Buff Pattern
| Normal |
|
| Hard |
|
| Extreme |
|
*Flight gauge
Stats
| Normal | Hard | Extreme | |
| Level | 110 | 150 | 190 |
| Recommended CC | 100,000 | 140,000 | 180,000 |
| Stamina Required | 16 | 20 | 24 |
| Attack | 7,854 | 10,593 |
|
| Defense | 3,450 | 4,650 |
|
| HP | 184,660 | 293,580 |
|
Strategy and Team Composition
Each demon has its unique trait and applies a certain strategy to defeat it. While the trick for Red Demon requires constant crowd-control, Gray Demon can be conquered using these various approaches:
Burst
*Highly Recommended

|

|

|

|
|---|
| Damage | Buff | Skill-up | Sub (Unique) |
|---|
|
|

|
|

|
|---|
| Damage | Buff | Skill-up | Sub (Unique) |
|---|
Ult-Rush
*Safe team for beginners without a Green King
|
|
|

|
|---|
| Heal / Ult Charge | Buff | Skill-up | Sub (Unique) |
|---|
|
|
|
|
|---|
| Heal / Ult Charge | Barrier / Ult Charge | Skill-up | Sub (Unique) |
|---|
The most effective strategy is to build around Green King since he is the strongest attacker against the Gray Demon. Accompany with Green Helbram / Green Gilthunder as attack buffer and add Red Gowther for skill-ups to maximize the damage output.
| Hero | Role | Details | Get From |
|
|
Attack |
|
|
|
|
Skill-up |
|
|
|
|
Buff |
|
|
|
|
Buff |
|
|
| Heal / Ult Charge |
|
| |
|
|
Barrier / Ult Charge |
|
|

|
Attack |
|
|
|
|
Sub |
|
|
|
|
Sub |
|
|

|
Optional |
|
|

|
Optional |
|
|

|
Optional |
|
|
Rewards
Various rewards are given after clearing the Death Match which is necessary for Hero Limit Break, Hero Awakening, and Equipment Awakening.
Reward Rules
- Increased chance to acquire better rewards for winning while alive.
- Increases Village Friendship upon clearing a Death Match.
- Gives buff to apply discounts to all items purchased with gold in the village shop.
Death Match Victory Reward
| Normal | Hard | Extreme | |
| Guaranteed Reward | Gray Demon’s Wing x2 | Gray Demon’s Wing x2 | Gray Demon’s Wing x2 |
| Party Leader Reward | 3* Water of Life x2 | 3/4* Water of Life x2 | 4/5* Water of Life x2 |
| 3* Demon’s Blood x2 | 3/4* Demon’s Blood x2 | 4/5* Demon’s Blood x2 | |
| Gold Box Chance | 20% | 12% | 8% |
| Silver Box Chance | 30% | 28% | 22% |
| Bronze Box Chance | 50% | 60% | 70% |
| Gold Box | 3* Awakening Stone x1 | 4* Awakening Stone x1 | 5* Awakening Stone x1 |
| 2* Awakening Stone x1/2/3 | 3* Awakening Stone x1/2/3 | 4* Awakening Stone x1/2/3 | |
| Silver Box | R Treasure Chest x1/2 | SR Treasure Chest x1/2 | SSR Treasure Chest x1/2 |
| Bronze Box | Gray Demon’s Wing x1/2 | Gray Demon’s Wing x1/2 | Gray Demon’s Wing x1/2 |