Published: October 25 2021
Last Updated: December 16 2023

This guide covers the recommended team compositions and strategies to beat Hraesvelgr. The goal is to maximize the acquisition of Wind Source, a rare material exclusively acquired from First Time Stage Clear rewards and World Tree Tower Exchange Shop.
Demonic Beast Battles are the main source of Holy Relic materials. When crafted, it grants special effects and additional basic stats to registered heroes. It is the most difficult PVE content to clear, requiring your heroes to be maxed out in levels and equipment to compete. Specific skills are also needed to counter the gimmicks on each Phase. Power Strike, Taunt, and Cleanse/Heal are vital skills to have on your team.
There are currently three floors, each with 4 phases to clear. First Time Stage Clear Rewards can be claimed after clearing a floor once before reset. Simultaneously, stage rewards can be farmed repeatedly to acquire other materials.
You can repeatedly claim 1 Wind Source as a guaranteed reward when clearing the third floor of Hraesvelgr's Nest.
Recommended Artifact Sets:
- No. 19: Hraesvelgr’s Nest (Ideal for Offense)
- Increases allies’ single-target attack damage dealt to enemies by 4% / 8% / 12% / 16% / 20%.
- No. 2 Guardian of Istal (Highly Effective for Defense)
- If an ally is Debuffed from a skill during the enemy’s turn, restores 1% / 2% / 3% / 4% / 5% of their Max HP. (Excludes PVP and Death Match)
Recommended Units[]
Damage Dealers[]
Heroes who can deal exceptional damage to the boss. All main DPS units are recommended to be used with Red Sariel as an association link.
- Dark Traitor Meliodas
- Arguably the best choice for damage due to his Amplify skill. In Floor 1: Phase 4, the boss has increased defenses, which Meliodas can easily break through with his Amplify skills. Not only that, but activating his Unique Ability offers damage reduction to the entire team, increasing survivability. This unit does not need a high Ultimate level to work, but it does help. It is recommended to pair this unit with other single-target attackers to maximize synergy though watch out for buff removal attacks that can pose a issue here.
- Gear Set: Attack / Crit Damage
- Light "The One" Ultimate Escanor
- This unit can effectively replace Blue "The One" Escanor. Aside from his Ultimate, he can do more damage than the other Escanor while having more modern stats. This does not mean that the other Escanor is ineffective or overly outdated, but Ultimate Escanor is simply more consistent and reliable.
- Gear Set: Attack / Crit Damage
- Blue "The One" Escanor
- While older at this point in time, this Escanor unit can still be a great choice for players lacking more modern damage dealers, as he has been released for free in the past. Regardless, thanks to his Flood skill, he can still output good damage alongside another damage dealer. Most importantly, this unit possesses an Ultimate with the Death effect, allowing him to hit the damage cap twice if sufficiently leveled.
- Gear Set: Attack / Crit Damage
Utility/Heal[]
Heroes who can heal or cleanse to take away any Debuffs and avoid Weak Point damage. The remaining HP of your team is carried over after clearing the lower floors. Thus it is advantageous to survive with high HP.
- Blue Megellda
- While much more effective with her Holy Relic, Magellda is the best healer for this boss. She was created for specific use here. Along with good healing, she can Buff ally stats if she heals them to full HP. With her Holy Relic, she can buff her allies even if they are not fully healed, making the Buffs more consistent while removing one Debuff off all allies. Her Ultimate can easily hit the damage cap, even at lower Ultimate levels and her own Amplify skill can hit decently hard with proper buildup from her Buffs. Megellda is the most important unit on the team as she makes the boss many times easier and allows many units to be run. Therefore, it is recommended to grab her Holy Relic first.
- Gear Set: Attack / Defense
- Green Princess Elizabeth
- If you lack Megellda, Princess Elizabeth can also serve as a suitable healer, but understand that her damage is extremely lacking and her defenses are quite dated. You will want to replace her as soon as you get Megellda, as there is no healer better than her for this event. If nothing else, Elizabeth does grant the team Ultimate Gauge with her Ultimate move, making it easier to rush Ultimate moves.
- Gear Set: HP / Defense
Taunt/Tank[]
Redirects all single-target attacks to the hero. It will also cause Hraesvelgr’s Air Blast (Floor 2, Phase 2) to miss when the skill is activated. Do not use units with short taunts that only last one turn if you can avoid it, as that will make you have to constantly replenish the Taunt and rely on RNG. You can opt out of using heroes with Taunt if you are farming Floor 1 or if you can defeat the boss before it uses its attack in Floor 2: Phase 2, though that will require units who can bypass the damage cap the boss possesses with skills such as Scorch, Death, or Abyss. All Taunt units are best with Blue Tarmiel as an association. Faster teams do not include a Tank character.
- Red Halloween Matrona
- This unit is the best choice for tanking. She has a 3-turn Taunt at rank 1, heals the team every turn based on how low her HP is, and can remove Buffs and Ultimate Move Gauge. However, do note that her damage is not very good even with buffs from other units to increase damage. There is a specific case in Floor 3: Phase 3, where the boss will begin disabling certain kinds of skills every turn. Matrona is considered better than Diane (mentioned below) as Buffs are disabled later than Stances, giving you more time.
- Gear Set: HP / Defense
- Red Festival Queen Diane
- The second-best choice for tanking. Diane has a 2-turn Taunt at rank 1 and a 3-turn Taunt at rank 2/3. One thing Diane is superior with is her damage and Ultimate Move control as she can do it with her normal attacking skill and isn't reliant on her Ultimate. Moreover, her Stance Taunt skill allows her to reduce the team's received damage by 40%, giving her a unique utility against AOE attacks.
- Gear Set: HP / Defense
Support[]
Heroes who can power up and boost the team (rank-up, damage increase or as a second damage dealer). With Blue Megellda on the team, you can actually experiment with many units and likely still win. So, feel free to try out different fourth units to whatever suits your playstyle best.
- Green Festival Gowther (Holy Relic Required)
- With his Holy Relic, Gowther can increase the Attack-related stats of your allies when at full Ultimate Gauge, while offering his own damage and Ultimate Move Gauge control. However, his Debuff card is largely useless as the boss is immune most debuffs in early phases and all Debuffs in later stages.
- Gear Set: HP / Defense
- Green New King Arthur
- Arthur is a strong fourth member of the team. His innate damage reduction and damage increase to all allies are unlikely to ever be outdated. While his own damage can be lacking in most instances (short of his Ultimate), his Unique Ability is so good that he is worth running. Just make sure nobody on the team (or himself) dies as his Unique Ability will deactivate.
- Gear Set: HP / Defense
- Green Brunhild
- Another strong DPS option, Brunhild can heal the team with her Ultimate and dish out great damage with her skills. Since she has a Power Strike skill, she makes a strong option to help clear the final phase of Floor 1.
- Gear Set: Attack / Crit Damage
- Blue Festival Cusack
- This unit is recommended with a higher Ultimate level due to gaining the Abyss effect on his Ultimate once it is at least ranked 3/6. He is still usable without the Abyss effect but becomes a weaker choice with only his Attack skills. Without Abyss, the team will require a Taunt unit. His Holy Relic is not required to be used, but of course, will help immensely.
- Gear Set: Attack / Crit Damage
- Blue Festival Berserk Estarossa
- He can apply Darkness to the boss which increases the damage it takes from ally skills and increase allies basic stats for each Darkness on the enemy. His own damage is also nice if you properly build him with offensive gear. Estarossa works better with at least one other Demon or Commandment unit as only Demons and/or Commandments can apply Darkness on the boss. If his Ult Move has a high level it can deal massive damage for phases that the boss buff itself.
- Gear Set: Attack / Crit Damage
- Blue Festival Ludociel
- Ludociel serves as a Buff unit. She can provide Buffs for your Amplify characters as well as increase the tanking ability of the team while increasing their damage. Her Ultimate can hit fairly hard but that is not her main purpose.
- Gear Set: HP / Defense
Recommended Teams[]
The teams listed below are all capable of beating all three stages of the boss. In any instance where either Light "The One" Ultimate Escanor or Dark Traitor Meliodas is listed, they can be interchangeable with Blue "The One" Escanor or Dark Purgatory Meliodas, respectively, as they all serve the same role. The same is true for Megellda and Green Princess Elizabeth, along with Red Festival Queen Diane and Red Halloween Matrona. Teams that do not have a tank listed are because they have a unit that can bypass the damage cap, effectively eliminating the need for a Taunt character. Of course, if you find someone on the team consistently dying or taking too much damage, use a Taunt unit.
If you are not using Megellda and are instead using Green Princess Elizabeth or some other healer, please note that you will be much more reliant on having the stronger DPS units to succeed.
| Main DPS | Utility/Healer | Taunt/Support | Damage/Support | |
| Team 1 | 
|

|
 / / 
|
 / / 
|
| Team 2 | 
|
|

|
|
| Team 3 |  / / |
 / / 
|
|

|
| Team 4 | / 
|
|
 / / 
|
 / / 
|
| Team 5 |
|
 / /
|

|
|
| Team 6 | 
|

|

|

|
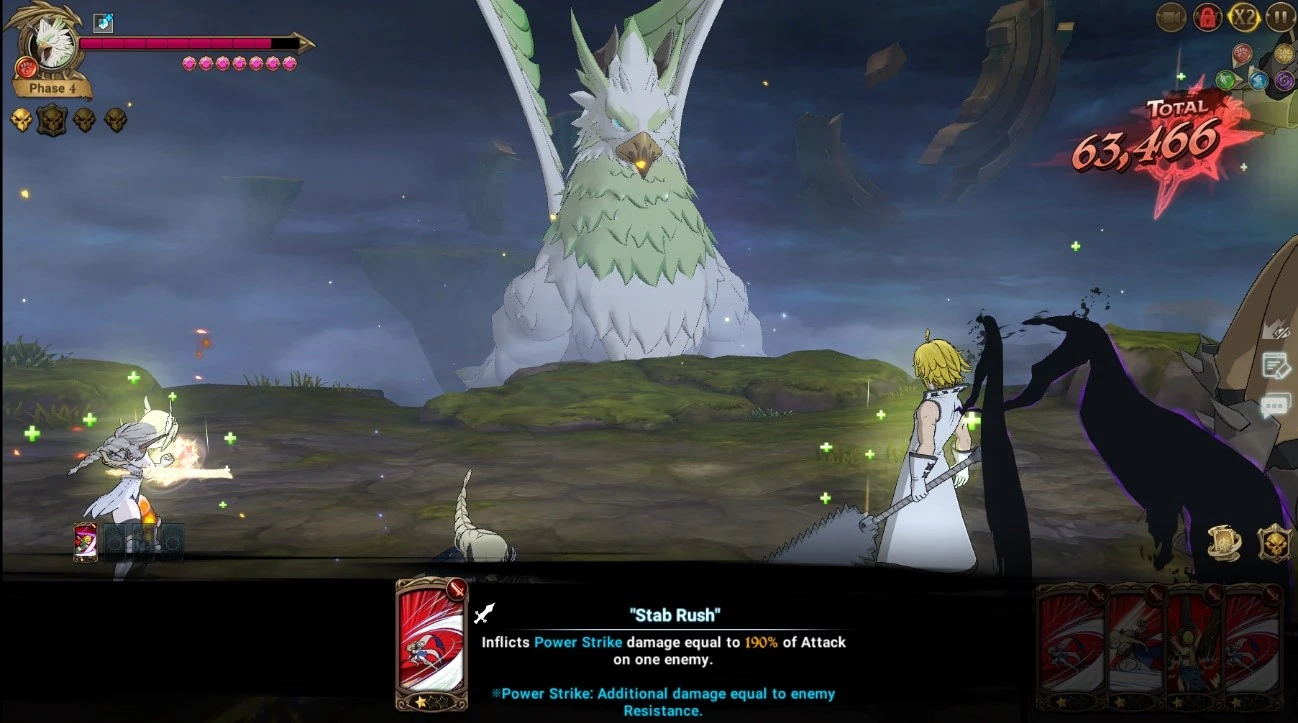
Floor 1 Strategy
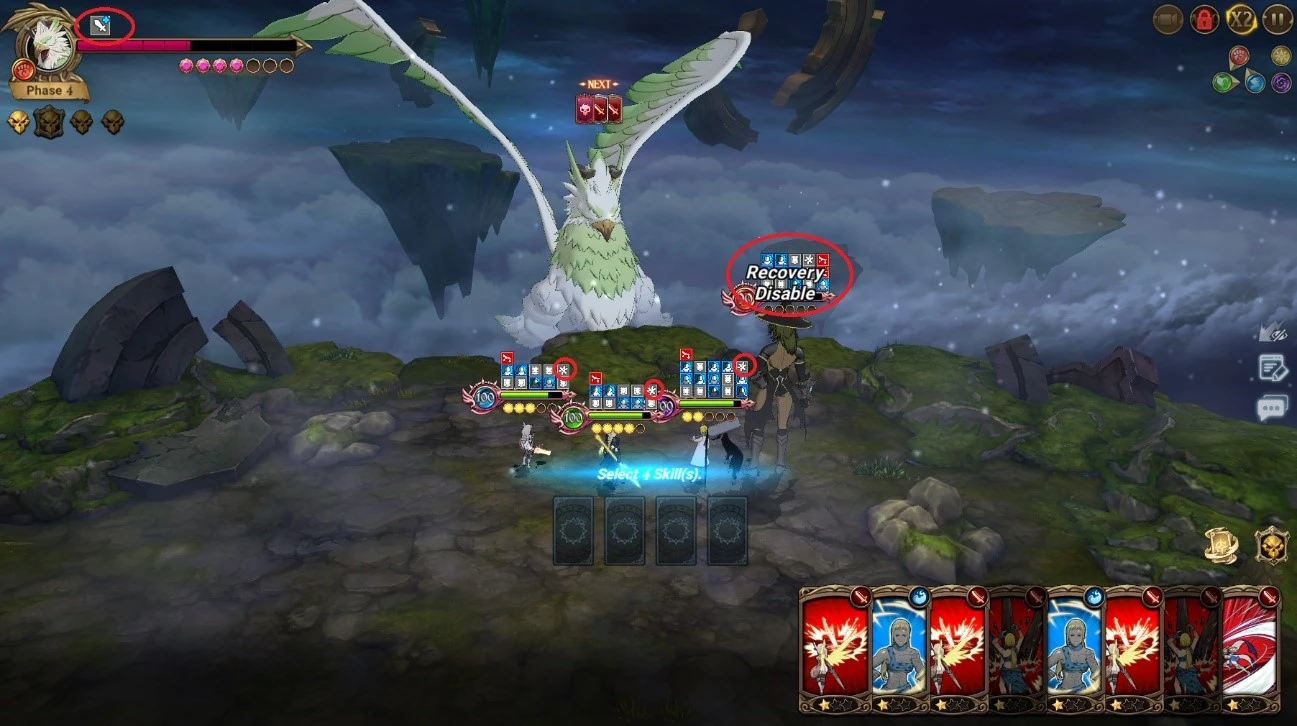
For this floor, there is no real gimmick you need to worry about outside of Phase 4. Within that phase, the boss has increased defenses, making it difficult to do damage. For this reason, you should save your Power Strike and Amplify skills to deal damage. After a few turns, the boss will instead gain an irremovable Attack Buff (in place of the Defense) and inflict Infect upon your team which restricts Recovery-related stats, and it can not be removed. Ideally, you'll want to kill the boss before this occurs. These two states are pictured below. Also, in Phase 3, the boss can remove Buffs. So, keep that in mind as the boss may target your Amplify unit after removing the Taunt from your tank (unless you are using Red Festival Queen Diane who uses a Stance). However, it isn't the end of the world if that happens as you can easily regain Buffs with Dark Traitor Meliodas.
Besides that, attack the boss like normal while maintaining your Taunt. If you find yourself not gaining any good Attack skills, you can stall on any of the earlier phases to buy yourself some extra time to gain them or a strong Ultimate. If using Blue Megellda, remember to use her Recovery skill to grant Buffs to allies.
Floor 2 Strategy
As stated on the first floor, the first phase has no specific gimmick. It's best to use this time to start building up to your desired skills. Make sure to save a Taunt skill if you do not plan on killing the boss in one turn during Phase 2. This is important as the boss will more than likely kill you with its special attack without a Taunt active, which makes the attack miss. Again, if you have a unit that can bypass the typical damage cap, then you can simply attack and kill the boss in one turn. For example, Blue "The One" Escanor can use his Death Ultimate to hit the cap twice, followed by three attacks from any other unit or those with Abyss such as Green Demon Lord Rimuru Tempest and Blue Festival Cusack (With Ult Move Level 3 or higher) that deals extra damage at the end of your turn. The Revive passive the boss has during Phase 2 is weak, so any attack should kill it post-revival.

In Phase 3, there is a new gimmick to deal with. At certain HP levels, the boss may increase its Attack-related stats, Defense-related stats, or Recovery-related stats. You do not want to attack multiple times unless you are prepared to kill the boss. Thankfully, the boss is not particularly tanky during this phase. The safest way to approach this phase is to hit the damage cap once in a single attack during the first turn which only activates the extra defense, allowing the boss to attack, which can allow those with Power Strike to take advantage of extra resistance to deal more damage, and then wailing on it until it dies on your second turn. Of course, you can just kill it during the first turn if you have the skills to do it as there is no revival here.


In Phase 4, you simply can just attack it at will. There is no gimmick to worry about. Keep your Taunt up as usual and attack until the boss reaches zero HP.
Floor 3 Strategy
During Phase 1, you'll notice that the boss is very tanky. Not only that, but the boss can apply the Blockade Debuff which will seal any skill above rank 1 and still has a max damage cap of 30% HP. This Debuff can be removed with Megellda or any other Cleanse unit. However, this will be hard to do if the boss has a passive that applies a stat Debuff every turn. Regardless, this phase can take a bit longer if you are forced to use only rank 1 skills as the boss takes reduced damage from them. After some turns, the boss will apply a Debuff that will make your team takes 30% more damage which can be cleansed. Ideally, you'll want to beat the boss either the turn before this is applied or the same turn. If you have Blue Festival Berserk Estarossa once inflicting max stack of 5 Darkness will negate it’s reduction and allow to take normal amount damage from rank 1 cards incase you are unable to cleanse the seal that blocks out any cards higher than rank 1.


In Phase 2, there is no specific gimmick to worry about besides skill deletion. This means the boss has an attack that will delete skills from whoever it hits. This is where a Taunt unit can be very useful as they will take all the hits because the attack is a single-target move, allowing your DPS units to keep their cards. Still, just attack the boss as usual but do keep some strong cards for the next phase. Try to kill the enemy before it can use its Ultimate Move as it will wipe all the Buffs from your team which can cause you issues in the next two phases.
In Phase 3, there is a new gimmick introduced. The boss will seal a certain type of skill every turn for multiple turns (long enough that you will likely finish the battle before it wears off) and it cannot be removed. The order is as follows: Stance, Debuff, Buff, Attack skills, and lastly Ultimate Moves. If you take so long that you get Attack sealed, you should just reset the stage and try again as you will be basically be a sitting duck. This is where Red Queen Festival Diane can suffer as her Taunt is a Stance skill, meaning you either kill the boss in one turn or you accept that you'll lose your Taunt skill for Phase 4. How you approach this phase is up to you, where you can try and kill the enemy as fast as possible to avoid the sealing, or you can let it seal you for some turns to gain some better skills. In most instances, you can let it seal Stances and Debuff skills with no real consequence as most of the team compositions you may use won't use those things. Though the boss using Evasion buff can pose a issue to you if you have no unit with buff removal or ult moves available to use as Evasion doesn't work on Ult Moves.
In Phase 4, your approach to it can vary depending on the passive the Demonic Beast gains. If you gain the "Revive" or "Weapon Destruction" passive, you can simply attack the boss as much as possible because the boss has a Flood Attack skill, which deals more damage based on how high its HP is. The higher the HP is, the more damage that will be dealt. Note that with the Revive passive, it will recover 50% HP after being killed one time, so be prepared to keep attacking. Now, if you get the "Overcome Crisis" passive, you'll have to attack the boss in a different manner. With this passive, the boss will completely heal itself and increase all of its stats when surviving with 25% HP or less. It is essential that you kill the boss without activating the heal as it will much more difficult to kill the Demonic Beast with the increased stats. It's not impossible to win after the passive is activated, but for some, it may be better to simply reset the stage if it activates. A very helpful trick is to close the game if the heal activates and logging back into the game. You will be asked if you want to continue the battle and after accepting, the turn will be reset. This only works if you exit the game while your turn is active because if the boss's turn starts, this will not work. The boss will inflict a stance disable debuff that will overide the grey Stance Disable and you can use Fest Diane's stance again either waiting or use a cleanse unit but it will block out recover cards too.
Recommended Holy Relics to Craft[]
- Blue/Red Megellda - Will of the Valkyries
- Green/Red Brunhild - Light of Baldr
- Green Festival Gowther - Finnsleif
- Holy Knight Gowther (Halloween/Red) - Ullr's Legendary Bow
- Green/Red Shin - Thiassi's Eye
- Green Festival Merlin - Golden Apple of Idun